LIGHTS, CAMERA, ADVENTURE! PART TWO: VIDEO EDITING
In the second of his how-to series on travel videos, ABR and creator of YouTube’s awesome Brainrotting motorcycle flicks, Graham Styles, has some advice for budding film editors
 I’ve been riding and recording my motorcycle adventure, Brainrotting, for the past three years. Having had no previous video-making experience, I want to share with you some of the lessons I’ve learned along the way, to help you with the challenge of creating travel videos that people will want to watch.
Last issue we covered camcorder and helmet camera selection; now I’m going to give you my view on the PC versus Mac debate, discuss how to store all that video data and camera equipment on your motorcycle while travelling, and finish by passing on a little video-editing advice.
Laptop
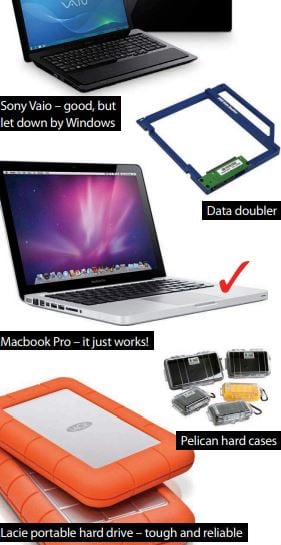
So, PC vs Mac; or in my case a top-of-the-range Sony Vaio versus a 15″ Macbook Pro. If you plan to edit in high definition (HD) I’m afraid a travel-friendly netbook just won’t cut it.
I’ve tested both my PC and Mac to destruction, but when it comes to editing in HD, there’s only one clear winner. In the end what differentiated the two laptops wasn’t the hardware, it was the operating system (OS). Windows for PC, although adequate, proved unreliable, slow and prone to crashing, whereas my Mac just works.
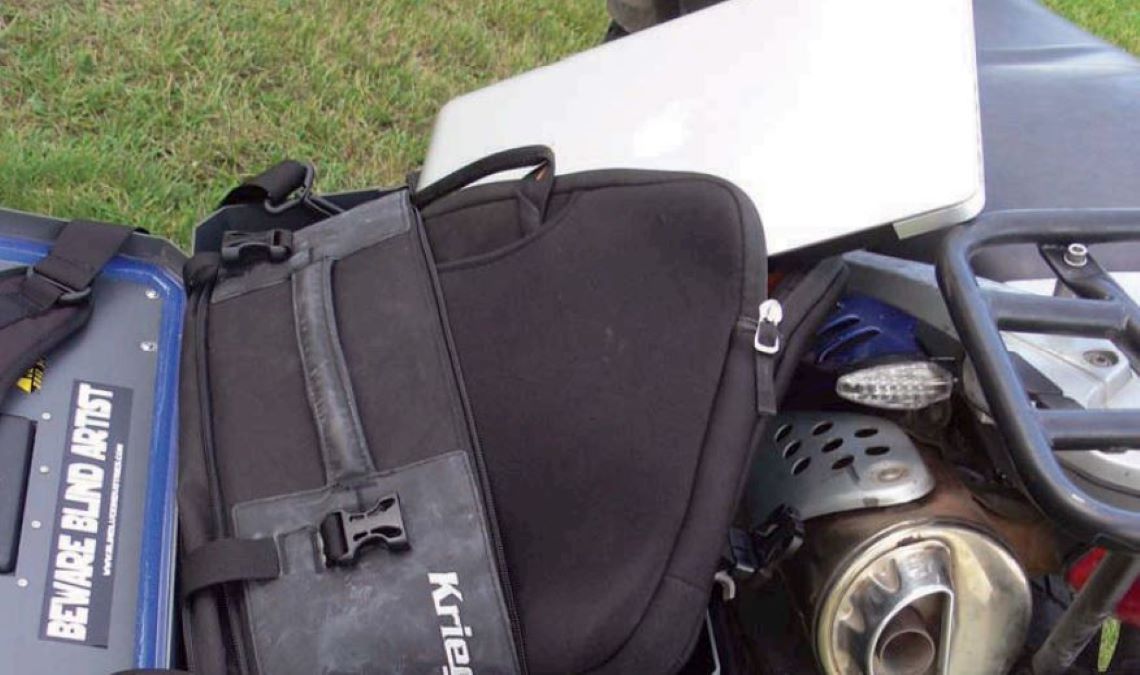
The casing of my Macbook is cut from a solid block of aluminium, and the LCD screen is protected behind a sheet of glass. That solid aluminium body has successfully absorbed the pounding of the road although, I’m afraid to say, I’m now the proud owner of a cracked Macbook screen thanks to potholes on the Linden-to-Lethem road in Guyana. While my PC screen didn’t crack, the body blows it received from the road were eventually fatal. When it comes to rugged design, and despite having a cracked glass screen, the Mac wins the battle.
To edit and play video in HD you need sufficient memory in your laptop. I’d suggest a minimum of 4GB RAM, and you’ll soon eat up the hard disk space with all those HD movie clips, so I’d recommend buying a machine with the largest hard disk you can afford. Something that’s easily overlooked is the speed at which your hard disk spins and the rate at which it reads data. Standard hard disks spin at 5,400 rpm. If possible, upgrade to a hard disk that spins at 7,200 rpm. This will help minimise dropped frames when editing and previewing your video. I’ve heard that disks spinning at this speed can be less reliable, so always remember to back up your work regularly.
If you have deep pockets and you’re more serious about your HD video editing the new range of Macbook Pros have Intel Quad-Core processors that I imagine will make short work of playing and editing your video clips. At this end of the market the option to configure your Macbook or Windows laptop with a Solid State hard disk (SSD) is compelling and will no doubt remove the problem of dropped frames when editing. Unlike standard hard disks, SSDs have no moving parts, making them much faster and less prone to failure. SSDs come with a higher price tag and may leave you short of storage in your state-of-the art laptop; the solution? Upgrade your machine by adding a second internal hard disk or SSD using an Optibay Drive Kit from MCE Technologies (www.mcetech.com) or a Data Doubler from OWC (eshop.macsales.com)
Other advantages to the Mac? Mine came preloaded with iLife software. I use iWeb to design and upload the Brainrotting website; iMovie to produce neat travel maps with a line plotting the route from location to location, and Garageband is a great source of copyright-free soundtracks and audio effects.
Portable Hard Disk
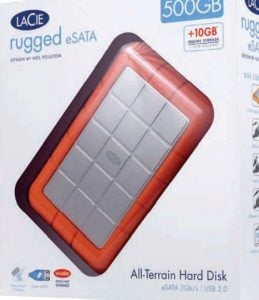 This final piece of hardware will allow you to backup your laptop and store your archived videos. If you’re travelling for a long period of time you’ll quickly fill the hard disk on your laptop so it’s pertinent to pack more than one additional portable hard disk. Having got through a number of portable hard disks to date, only one brand has stayed the test of time, my Lacie Rugged drive (www.lacie.com). If you choose to go with a cheaper but more vulnerable alternative, consider protecting it in a Pelican case which is both tough and waterproof (www.pelican.com)
On-bike storage
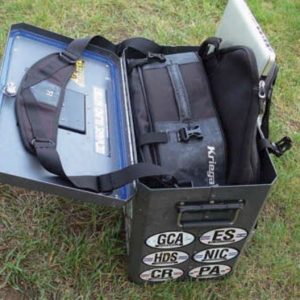 My laptop is protected in a padded carry case packed inside a Kriega KS40 pannier inner bag and shares that space with my clothes. I have a tripod and monopod tied to my roll-bag on the back of my motorcycle with bungee cords (I’ll be discussing these in more detail next issue.)
Something like a Kriega R8 ultra-tough enduro waist-pack is the perfect way to store your camera and accessories when you’re on the move (www.kriega.com). I’ve also added the handy Kriega Kube Pocket to my waste-pack. I started my trip with a tank bag but not only did I find that it interfered with my off-road riding position I also felt uncomfortable leaving expensive equipment on the motorcycle, especially at borders or when nipping into a store to buy a drink. The beauty of the Kriega waist-pack is that all your expensive camera gear is going to stay with you at all times, and one of the pockets, which is big enough to store two camcorders, is completely waterproof.
Video editing and uploading
Of course, once you’re ensconced for the night, you’ll need to edit and upload your video. Getting to grips with video editing is like riding a motorcycle: only by getting on it and gaining experience will you improve. Have a go at making videos before leaving home, test out effects and scene fades, and try to develop your own style. The various video-editing programmes on the market are all very similar to one another, the only thing to consider when making your choice is that you’ll need a product that can edit your high definition .MTS (AVCHD) format video clips.
Prior to filming in HD video I cut my teeth using Microsoft Movie Maker. It’s free software pre-installed on Microsoft PCs, and while it’s limited in its scope you can start getting to grips with editing from video clips taken using a standard digital camera. It allows you to edit one track of video and two tracks of sound, something you’ll soon outgrow as you develop your own style and want to experiment more, but a good starting point nonetheless. Apple pre-installs iLife on its new computers, a software package that includes iMovie, Apple’s entry-level video-editing software. More feature rich than its PC counterpart, the latest version of iMovie allows you to edit using a more traditional timeline – a more intuitive way to edit video.
The initial Brainrotting episodes were edited using Pinnacle Studio for the PC, but now I’m the proud owner of a Macbook I edit using Apple’s Final Cut Express. For previewing raw high definition .MTS files I use VLC player (www.videolan.org/vlc), a free open-source media player. For converting raw high definition .MTS files and uploading to YouTube I use VoltaicHD by Shedworx (www.shedworx.com/voltaichd), $39.99 (£25) for either PC or Mac.
Editing: Step-by-step
When preparing to edit a new Brainrotting video the process I routinely go through is as follows:
● Copy raw .MTS video files from an SDHC card to my laptop
● Review footage using VLC player and rename or delete clips
● File video clips in folders based upon country and location
● Decompress the raw .MTS video files into Quicktime movies using VoltaicHD
● Import Quicktime movie clips into Final Cut Express for editing
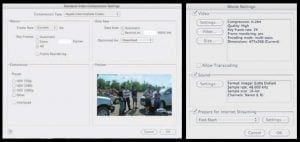 The reason I convert .MTS files and then import their respective Quicktime files into Final Cut Express, rather than importing the data directly via the application, is that later on I can save on disk space by retaining the compressed video files only. Importing videos directly through Final Cut Express makes it harder to retain your compressed video files and will leave you with a data storage headache. Once I’ve finished editing my video I simply go back and delete my Quicktime Movie clips while retaining my original compressed .MTS video files. The Quicktime movies can be up to 10 times the size of the compressed .MTS files, which requires a lot of additional disk space.
Worldwide fame
 Once you’ve made your travel video masterpiece you’ll probably want to share your video with the world via video sharing sites such as Vimeo or YouTube. I’ve flirted with Vimeo but, love it or hate it, if you want your video to reach a larger audience YouTube is the better option.
My fully edited HD videos often reach over 7GB in size, a daunting chunk of data when I’m wanting to upload it from a hostel in Bolivia with an internet connection akin to a tin-and-string telephone. To my surprise I’ve had few problems uploading my videos using VoltaicHD by Shedworx. VoltaicHD converts the video prior to uploading it to YouTube, compressing the data to about one tenth of its size and then slowly pushing it up your internet connection to YouTube. Since most hostels I’ve stayed at have internet connections of varying quality I usually kick this process off over night. By using VoltaicHD my upload times typically vary from 3-8 hours, and it appears to be able to deal with uploading over the more unreliable of internet connections.
I hope this article has been insightful and encourages you to take the plunge into amateur video-making. Next issue, I’ll be sharing some of my shooting techniques, top tips on how to make a good travel video, and once it’s all finished, how to go about promoting your video on YouTube.
Top tips for uploading
When setting up your file conversion, type in: VoltaicHD. Select: PREFERENCES, CUSTOM, QUICKTIME MOVIE, then select OPTIONS, SETTINGS. Compression type should be APPLE INTERMEDIATE CODEC and the compressor pre-set should be 1080p
When exporting your final video from Final Cut Express select: FILE – EXPORT – USING QUICKTIME CONVERSION.
From there click on OPTIONS, SETTINGS. Compression type should be APPLE INTERMEDIATE CODEC and the compressor pre-set should be 1080p
Top tip for editing
If you’re new to Final Cut Express some Apple stores run free workshops giving you an overview on how to use the software. It’s easy to book a place online via the Apple website. For more, see www.apple.com/uk/retail/workshops
Top tip for soundtracks
Are you making a non-profit film and looking for copyright-free music? You can apply to license a track from DJ musician Moby’s back catalogue of selected released and unreleased material at www.mobygratis.com

